
i've quite never done real tutorials on here, i'm not a big fan of tutorials anyways since to me, makeup should stay somewhat spontaneous and creative. you might want to learn techniques and rough schemes (i think the vloggers and serious makeup artists on youtube do a brilliant job!), but the choice of product and colour should stay up to you.
so this is my first attempt on a full face tutorial-like post, in fact it's just a step by step highlighting on some tricks and techniques i developed during the last year or so.
please bear with any shortcomings, as always your constructive criticism is highly appreciated!
(also, please overlook the "old" photo quality, the pictures for this post were shot a few months ago.)
some time ago i told you that i was into the "ulzzang" makeup look. ulzzang, uljjang or eoljjang is a korean term and means "best face" or "good looking" - to me, it's to make the best out of oneself in an almost indiscernable manner.
it's all about this very youthful and natural look that is adorable on hallyu starlets.
this includes a flawless, bright complexion makeup and point makeup that sculpts, enhances and flatters your features without adding too much obvious effects such as colour or shimmer. the aim is to look pure and natural, but most times there are many products and a lot of work behind.
my approach is the soft version of "ulzzang", no fake eyelashes, circle lenses, or duckface - promise!
although many steps and even more products are involved, it's a well thought out selection. choose the most refined textures, natural finishes and perfect shades for your skintone.
the full-on look would cost too much effort for everyday, this is something i'd do for a job interview or first date and the like. on a normal day-to-day-basis, i can still embrace many of the steps shown here, though!
__________step 1 - base makeup___________

ByTerry Hyaluronic Face Glow - Guerlain Lingerie de Peau Foundation - BeautyBlender

face concealer: Essence Smokey Eyes Brush - Maybelline Dream Mousse Concealer

undereye concealer: Giorgio Armani Master Corrector #2 - Giorgio Armani High Precision Retouch Concealer

Guerlain Les Voilettes Mineral - Chikuhodo Z1
starting point is the regular face makeup with +/- primer, foundation, +/- undereye corrector, undereye and face concealer, setting powder. maybe be a bit more thorough with pinpoint-concealing to achieve a flawless canvas.

__________step 2 - eyebrows__________
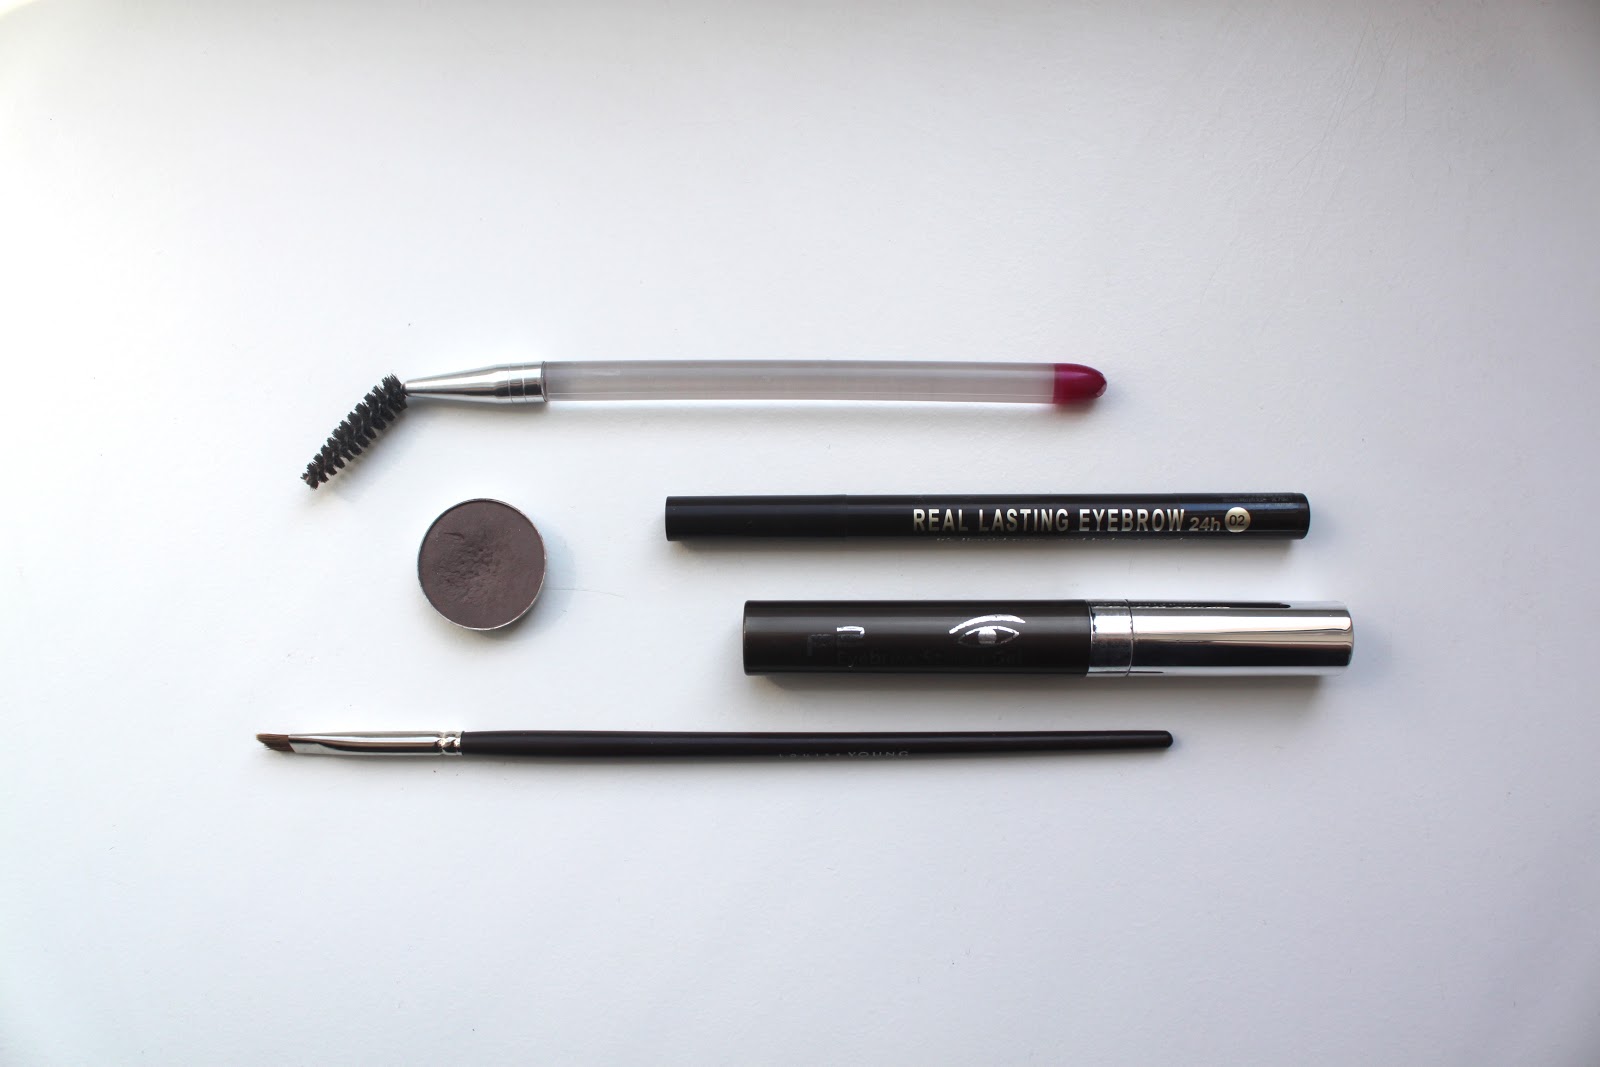
spooley wand - MAC Copperplate - K-Palette 1 Day Tattoo Real Lasting Eyebrow - P2 Brow Gel - Louise Young L31
now i'd do my brows, this is a key feature in ulzzang makeup. the eyebrows should be quite full and thick, very straight and well-groomed to open up the lid space and fake this child-like innocent expression for a bright and youthful look.
i fill in my brows very carefully and use brow powder, a liquid pen to fake hair structure where there's none and brow gel. you can find a more detailed description in my brow tutorial.

__________step 3 - dimension & contours__________
3.1 warmth

BA by Pola The Powdery Foundation (sample) - Chikuhodo Z9

the asian ideal of beauty also consists of a slim face with almost pointy chin contour, a V-shaped face. as i have a rounded face shape but am not averse to a slimmer jawline i would want to fake this with contouring (wouldn't really consider plastic surgery like implants or jawbone reshaping ;) ).
since i've blanked out a lot of dimension in my skin with foundation and concealer, now i need to draw it back on.
to slim down the face and subtly define the V-line, i'd apply a slightly darker powder to the perimeter of my face (marked area on the pic below XD excuse my poor photo-editing skills). i prefer a powder foundation or face powder a few shades darker than my skintone to a classic bronzer since the often darker and orange tinged bronzer colour can look obvious and unnatural.


3.2 face contour

Chikuhodo Z2 - Burberry Earthy Blush No.07
additionally to the warmth i gave to the outer parts of the face, i also contour the cheekbones with a different shade. to fake the shadow of imaginary prominent cheekbones, i would go for a darker colour with less orange but more rose and grey tones than what i used in the step before.
i usually blend out the first layer more softly (about to the size of the marked area), the second layer to intensify the depth is thinner, think the "magic line" - of course everything with utmost subtlety.


3.3 nose contour

an outstanding feature of the look is the very highlighted nose bridge to make it appear slimmer, straighter and higher, and to accent this i need to contour my nose.
from the root almost down to the tip i'd softly apply a contour powder with a smallish fluffy brush (contouring the root of the nose also adds more dimension to the eyes). i use a different shade for nose contouring than for cheek contouring, it should be a taupe with more grey in it since i don't need any rose tinge in the center of my face at all.
nose contouring is a tricky job, you can easily end up with a crooked, too thick or too thin looking nose or the drag-queen-look if you overdo it. you might want to try it a few times first (for example in the evening prior to makeup removal) before actually integrating this step into your routine.


3.4 highlights

Givenchy Le Prisme Visage Bucolic Blossoms (only lavender part) - Hakuhodo Kokutan Eyeshadow Brush L
since it's all about a bright and perfected complexion, highlighting is a must. shadows and hollows are put, now it's time to set some lights. because subtlety rules, i avoid shimmery products and go for colour-highlighting. a pale lavender shade with low pearl finish would be my first choice. it contrasts and absorbs any sallowness in my complexion and brightens effectively.
i'd apply the powder with a soft and small brush down the center of the face, fake a high nose and pointy chin and so on ;) for a more authentic look i could even go with a much stronger white pearl highlight for the bridge of the nose but since i'm on the low-key level, i'll stick with the sheer face highlighter.


__________step 4 - eye make up__________

here you have my eye before eye makeup. the aim is a bright, wide awake look with depth and dimension but without adding obvious elements.
4.1 lid shading

MAC PaintPot in Groundwork - Sigma SS217 Travel Size
first i'd add a natural colour very sheerly on the lids to make them appear less plain. i chose a cream shadow but of course it could be a powder eyeshadow as well. it should be a shade that is a few nuances darker than your skintone, without shimmer or pearl.

4.2 lid highlight

MAC Shroom - Chikuhodo Z5
where the light would naturally hit the eye area, i apply a light pearly champagne shade to enhance the natural sheen on the skin and to sculpt and brighten the eye.
i'm not too happy with my choice of MAC Shroom on that day, though. an eyeshadow with a more refined finish would've been better. sometimes i'd add a shimmery champagne cream eyeshadow on the lower waterline for an extra bright look (i like Benefit Creaseless Cream Shadow in Birthday Suit or Make Up For Ever Aqua Cream #13 for this purpose and would apply it with a brush like the Paula Dorf Eye Definer Brush).


4.3 adding depth

Maybelline Colour Tattoo in Permanent Taupe - MakeUpShow H07 Small Shader Brush
this step adds great depth and definition to the eyes, but it's so subtle that you can't really put your finger on it. with a firm and flat brush, i would apply a matte warm grey shade (i like Maybelline's cream shadow for longevity, but a powder eyeshadow like MAC Copperplate is also fine) very closely along the outer half of the upper lashline (thickens the lashline indiscernably, works as extra-subtle eyeliner to define and elongate the eye), fill in the small triangle shape on the outer corner of the lower lashline (adds depth and dimension to the eye) and meet and elongate the shadow on the outer corner. if needed, i'd blend out the edges very slightly to merge the line with my skin.


4.4 thicken lashline

MAC Fluidline in Blacktrack - Hakuhodo K005
to thicken the upper lashline and define the eye without the need of an obvious eyeline, i apply some black gel eyeliner on the upper inner rim (upper waterline) and work it into the roots of the lashes. for this task, i've yet to come across a brush more perfect than the Hakuhodo K005. it's thin, firm and smooth.
you definitely have heard of this "trick" before, but if you apply the gel eyeliner on the whole length of the upper waterline like normal, black smudges can reveal that you're wearing makeup when the time goes by. instead, just concentrate the ink on the center part above your pupil, this is less obvious but still has enough impact.


4.5 enhance lashes

Shu Uemura Eyelash Curlers - Kiss Me Heroine Make Long & Curl Mascara
as last step of the eye make up, i gave my lashes a good curl and applied a very waterproof & smudgeproof mascara. only one coat for a natural look.

my eye and face without and with this eye make up. a big difference without lots of drama.
before - after


__________step 5 - aegyo sal contour__________

NYX Blush in Taupe - Hakuhodo G5529BkSL
on my researches on "ulzzang" beauty i came across this very weird but interesting feature: the AEGYO SAL. this means "cute skin" and names the little extra flap of skin with connective tissue and fat underneath your lower lashline. closely, it looks weird but from a distance, the aegyo sal make the eyes appear bigger and give the person a cute and youthful look (hence the name) because it mimics the puffiness you get when you smile - even if you don't.
it's not the same as eye bags or puffiness from fatigue that we want to get rid of and people, who don't have it even undergo plastic surgery to get it. i think it only works or works best on the rather plain features of an asian face.
i have it, not too distinctly but why not get some use out of it while we're at korean makeup?
because the aegyo sal always consists of the part that catches the light and its counterpart that casts the shadow, i sometimes contour mine to enhance it. with a very small rounded brush and the nose contour powder i fill in a defined area right where the shadow of my aegyo sal is and lightly sculpt it to fake a rounder, fuller appearance. on the flap above i concentrate a light, shimmery or pearly shadow on the center of the lower lashline that reflects the light even more (step 2 of my eye make up).
aegyo sal contouring is a sensitive step similar to the nose contouring. you don't want to go too obvious (just looks weird) but even more, you don't want to go too vague because in this case, it will only look like massive dark circles. a well-brightened undereye area just underneath the aegyo sal contour is a must!

before and after aegyo sal contouring.


__________step 6 - blush__________

Beauty Is Life Blush in Almond - Chikuhodo Z4
now it's finally time to add some colour and life back to the face. nude blushes are suitable as well as light pinks for this child-/doll-like complexion. i went with something inbetween that looks natural on my skintone but makes me look fresh and alive at the same time. it's important not to use shimmery shades and to blend it really well into the skin.

__________step 7 - just bitten lips__________

the final step to complete the "ulzzang" makeup are flushed lips. they should look like you have bitten on them or eaten strawberries just now. for a natural result, i wanted to retain the texture of my lips, so nothing shiny or glossy. thus, a light coral stain is the most suitable choice and it's longlasting, too. i exfoliated my lips before application to let them look fuller and smoother.
i focused to build up the saturation of the colour near the inner parts of my lips for this "just bitten" effect.
the final comparison:
normal foundation-face & ulzzang-makeup face
please share your thoughts, i'm very curious!

Ahh you're so gorgeous! And I love that you're doing step-by-step tutorials now--it was very well written and thorough with lots of great pictures! The end result is amazing! I've never contoured my face before, but I really want to try it now! (any excuse to get my hands on that Burberry Earthy blush! :P)
ReplyDeletewell, thank you Becca! i want to do some step by steps in the future, i'm happy that you liked this one. i was afraid this topic might be not too interesting for many :)
DeleteBurberry Earthy is an AWESOME contour, it's much too less talked about! you must try it!
Youthful and very detailed discussed! I like your tutorial! :D
ReplyDelete(and drooling over your brushes....)
thanks Jacq! i'm glad that you're not put off by the length ;)
Deletethese brushes are heavenly. to die for.
I'm saving up for more superb quality brushes... :) and i love lengthy posts as long as they're illustrated with good pictures, which you have!
Deletecheers,
jacq
What a great Tutorial! There are so many things that i didnt knew before. Especially aegyo sal contour! Crazy, but i really seems to work:)
ReplyDeletethanks for your comment! i'm happy that you could get to know something new and interesting!
DeleteSehr schöner, ausfühlicher Post.
ReplyDelete... aber das nächste mal dann bitte noch ne gute Schippe ulzzang druff, mit Circle lenses und etwas Niedlichkeits-Chi Chi ;D
Danke Bambi! hehe dabei hab ich nicht mal circle lenses XD wär' aber vllt. gar nicht so uninteressant ;)
DeleteI'm pretty speechless! What a wonderful post. I totally enjoyed reading it, though I don't think I have neither the skills nor the patience to re-create a look like "ulzzang" (not sure if it would work the same way on my European face). It really is a "lit from within" look, with every step being so subtle but the result very visible.
ReplyDeleteYour lips look so smooth *o*
thanks so much Maris! i would love to see your take on it!
DeleteA big post, not in lenghtness but in great tips :D
ReplyDeleteThank you for sharing such an interesting tutorial. It has been astohishing for me how natural one can look with just some tricks and a good hand :D
I'll try to improve my countouring and highlighting skills as I'm a complete newbie to that. You have showed me how important it cand be :)
thanks so much for your appreciation Papish! i'm so used to contouring now that i feel quite naked with foundation and blush only XD
Deletei like the natural look :)
ReplyDeleteyour face looks so bright and fresh, not to much colour, just beautiful!
thank you blumenband!
DeleteI love no-makeup makeup! This is something that would be great for 'everyday' if you could do it quickly enough. how long does it take you usually?
ReplyDeletehi fellow procrastinator ;) thanks for your comment! such a makeup normally takes me about 20, maximum 30 minutes. (when i watch yt videos while doing the makeup, it can easily take 10 mins longer ;D) if i hurry, maybe 15 mins? but i really love to take my time during the daily making up session :)
DeleteYou look absolutely lovely!
ReplyDeleteI have read about this undereye feature which is, apparently, called "crouching silkworm". and thought to be looking cute and youthful. I heard Korean actresses are getting fillers injected (ouch!) there when they don't have them naturally! I think your contouring trick looks really lovely and more than that isn't worth the pain :-s
thanks so much!
Deleteuhh i much prefer the korean term, anything with worm in it sounds really gross when it's about the face - even if it's the precious silkworm ;)
ikr, they do quite a lot. not only the fillers, also solid silicone implants and special cutting and suturing techniques are common. it would be really interesting to work at a korean clinic for plastic esthetic surgery to see all the techniques and surgeries they perform.
Very nice and soft make-up look, you are looking great with it, thanks for sharing
ReplyDeletethank you Silvia!
DeleteMy first thought was "whoa that is a lot of text", but it was really well written and informative. You look really great - fresh and natural.
ReplyDelete^^ i have a tendency to write super long and photo-heavy posts and it got worse these days ;P i'm glad that it didn't put you off and you made it through (and even enjoyed it!)! thank you :)
DeleteThis kind of tutorial is awesome :) I love how fine touches make such a difference to your face, it makes me want to perfect contouring and make myself look my best
ReplyDeletethanks for your sweet comment, Emmabovary!
DeleteMit Abstand der beste Blogeintrag den ich je gelesen habe.
ReplyDeleteEinfach nur informativ und gut erklärt.
Ich bin fasziniert.
mit abstand der beflügelndste kommentar seit langem. DANKE.
DeleteVery well written and detailed, I really find it helpful and interesting. I love you blog for its elegance, I don't think there is anything similar out there and I am so glad you are back now. I hope you will do some more of your favourite products of the month in the future and I really wish you would review some of the new chikuhodo brushes you are using. Thank to you I have found out about hakuhodo, now I am addicted and I am very grateful for that. My bank account not so much...;)
ReplyDeletethis is such a lovely comment, thank you for your support and appreciation! i will do a favourites post very soon, there are a few things i want to mention ;)
Deletei'm such a bad procrastinator when it comes to brush posts! that's because i love brushes so much, no description seems right and worthy of them!
i'm glad that i could bring you to the great quality of hakuhodo. have you already heard that their IMATS and Japan exclusive J-series (with the all white goat hair brushes) will launch shortly on August 21th?
Thats just amazing. I have to try this out.Thankyou.On another note, have you tried Chanel Vitalumiere liquid foundation or Chanel Vitalumiere cream compact foundation. I was curious what your thoughts on them were in comparison to Le Metier foundation.
ReplyDeletethanks so much Meena! i'd love to hear how your take on the look went! i haven't tried any of the 2 foundations you mentioned, sorry i can't be of help. i am curious on the one side but i also thought the vitalumiere would be suited for dry/mature skin. since the pro lumiere, which was for all skintypes, already lasted so badly on my oily skin, i didn't want to risk a fail.
DeleteOops, so sorry, I meant Chanel Vitalumiere aqua liquid and Chanel Vitalumiere Aqua cream compact. They are both meant for oily skins and are supposed to be oil-free
Deleteah, ok. i haven't tried the cream version yet but i own the Vitalumière Aqua foundation. i was never a fan since i tried a few samples of it and today, i still haven't found anything special about this foundation. not in the slightest comparable to Le Métier (it certainly is more lightweight than Le Métier though!). the effect is bleh compared to the LMdB Flawless Finish foundation, i don't understand the hype about Vitalumière Aqua at all and also i can't understand why i still got lured in once more to buy the full size.
DeleteWhat a great post! I've been enjoying your blog but haven't commented till now. Love the photos, the tips, the end result. Very well written, too! Thanks so much for the effort you put into this tutorial.
ReplyDeletethank you for leaving a comment Pia, i really appreciate it! i'm happy that you enjoyed this post.
DeleteThis was really interesting. Love the lip part! You're right, though. It seems very time consuming. Time is beauty !
ReplyDeletethank you! it's not too time consuming as it seems (ok, if 20-30 minutes are not too much for you), but the tricky part is to always have full control over intensity and saturation of the sheerness you apply. that can be quite stressful when you're half asleep in the mornings ;)
DeleteFantastic post - I love to do this type of makeup, it's great to see how you to it. You are much more detailed and precise than I am!
ReplyDeletethank you Emi!
DeleteGreat post! I appreciate how much detail you put into this and the final look is beautiful :)
ReplyDeleteVoodoogirl, thanks for your lovely support!
DeleteThis is so well done!! I read blogs and youtube videos but there is a lot in this that i haven't come across before - like the lavender highlighter and the contour below your eye. It was also beautifully illustrated.
ReplyDeletewow, thanks! i'm very happy that you got to know something new and interesting!
Deletegreat step by step post .. love seeing the subtle comparisons from one pic to another. very helpful!!! love your eyebrows ... checking out that post *now*
ReplyDeletethank you Faye Lu!
DeleteWoow, very nice look :)) I like it ! :)
ReplyDeletethanks Patty.
Deletewow,
ReplyDelete20 different products and 13 different brushes +BB + lash curler and at least 30 min to look almost "undone" :)))))
haha well, this is a very thorough make up. hum, because if you look at a real korean makeup video, there actually are many products and tiny steps needed ;P
Deletein fact i personally always do my makeup nicely even to the small detail. how many products and time do you think it would take me to look like a real slut? haha XD
wow! i have learned so much ! especially about contouring:) i'm following you:) thank you so much:)
ReplyDeletethank you! makes me really happy :D
Deleteyou look lovely! it looks perfect for an everyday look, just a hint of makeup that enhances what you already have. too bad with monolids like i do it's impossible to have just a thin eyeline to define my eye :'( in order for my eyes to look defined (and for the eyeliner to be visible when my eyes are open) i have to take the line quite far up so no matter how "natural" my skin is looking, the eyes make it seem as if i have far too much makeup on (although it's just eyeliner).... SIGH.
ReplyDeletebut you look GORGEOUS, drooling over your makeup!
thank you for the comment, Vera! i know it's a difficult task to emphasize a monolid eye but still make it look natural. i think the vertical gradient smokey eye flatters such an eye shape best. you just concentrate the darkness right near the lashline and fade gradually upwards, so it doesn't has to be a sharp eyeliner all the way up which is more obvious than this smoked out line. of course you can play with colours, a dark grey or cool toned brown may look more natural than a jet black. using matte shades up to above the lid fold a tiny bit and then starting to blend out the gradient with a shimmery shade adds more depth to your eye, as well as filling in this triangle on the outer corner of the lower lashline.
Deleteand how bold the makeup may be, the more confident we're wearing it, the more natural it seems :)
This is amazingly thorough!
ReplyDeletethanks Dain!
DeleteThis is the best tutorial for a natural look I have ever seen. Wonderful job! The ulzzang aesthetic is new to me, so fascinating.
ReplyDeleteoh wow, thank you so much!
DeleteIt's perfect! I find tutorials on youtube too much, and most of them use the same technique (white liner on the inner lid) that more often than not looks fake(at least to me). Your tutorial is amazing! Perfect natural look <3
ReplyDeletethank you, it's a big honour to me that you find my tutorial even better than yt vids!
DeleteThis is brilliant! I love the ideal of AEGYO SAL. I have been practicing as well. However, slightly different from what you're doing. For the under eye Aegyo sal area, I use a light eye shadow to put on it instead of contouring it. As I'm afraid it will turn out messy if the eye shadow didn't adhere to the skin and have fall-offs.
ReplyDeletewhat a lovely comment, thank you so much Coco! i think emphasizing the aegyo sal with a light shimmery eyeshadow is a perfectly fine method, especially since it's quick and easy. i wanted to take it to the next level with even sculpting it to enlarge its appearance with my contouring method. it certainly is something i don't do everyday and like i said one has to be careful regarding the fall out and sufficient undereye concealer to not let it look like huge dark circles ;)
DeleteWow, I did not know this style takes so much work! I'm a great fan of K-drama but somehow, not too much of their makeup style as I love colors too much. But this step by step is so interesting, especially the aegyo sal, that I'd have to try this one of these days.
ReplyDeleteGreat post!
haha i have such a love/hate relationship to k-dramas.
Deletei'd love to hear about the result of your take on aegyo sal contour!
This look is gorgeous, and you look gorgeous.
ReplyDeleteI'm a huge fan of this style of makeup; now I know what it's called.
Thank you!
thank YOU! ^^
Deletethanx for sharing..
ReplyDeletenever knew of aegyo sal before ^^
purplelyhazelly.blogspot.com
Such a beautiful, polished version of ulzzang. You are such an artist. Thank you for sharing your techniques and palette choices. I am very inspired to try this, even though my skill is far more modest!
ReplyDelete